Adobe XD for Image Manipulation
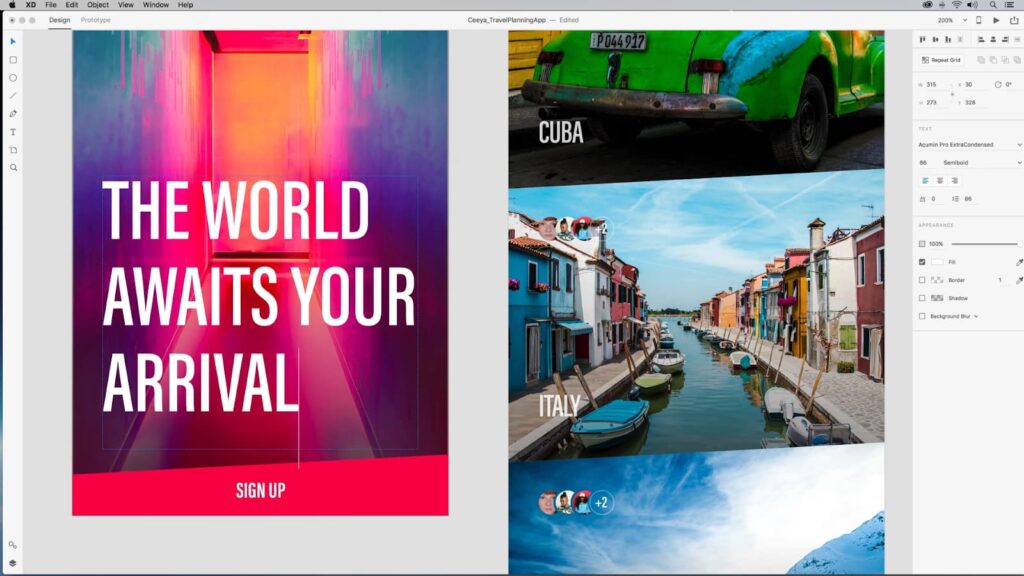
Adobe XD stands out in the design world with its sophisticated toolset and easy-to-navigate interface, making it a preferred choice for designing awe-inspiring websites, social media graphics, and more. This article delves deeper into various methods and strategies for manipulating images using Adobe XD, aiming to enhance your designs while saving your precious time. Engage your audience at a deeper level by bringing your creative ideas to life!
Importing Images into Adobe XD
Simplicity is a key attribute of Adobe XD, particularly visible when importing images into the platform. There are two primary methods to achieve this:
- The first method involves the traditional method of visiting the application’s main menu, selecting ‘File’, followed by ‘Import’. This opens up a dialog box, allowing you to browse and select any image on your computer;
- The second method is convenient and time-saving. Simply drag the desired image from your desktop (or any folder) and drop it onto the XD canvas.
BONUS TIP: Adobe XD allows you to drag an image over a shape or ‘frame’. The program then automatically fits the image into the shape—an exceptionally handy tool if you’re modifying a pre-existing design or replacing an image in a template.

The Use of Layers for Image Identification
Keeping track of your images in Adobe XD is simple with the ‘Layers’ panel. In this panel, all your images, along with their names, are organized neatly. This panel can be accessed by clicking on the layers icon situated at the bottom left of the XD window. Here, all your designs are grouped under ‘Artboards’.
Upon clicking an Artboard, you can view each sub-component listed, identified with its respective icon—text, shape, or image. Double-clicking the layer lets you rename it as desired for easy future referencing.
Simple Image Cropping with Adobe XD
- Adobe XD simplifies image cropping with its ‘Mask Editing Mode’. This unique feature assists in maintaining the aspect ratio of your images, preventing distorting effects like squashing or stretching;
- To use this feature, begin by masking your image—done quickly by dragging and dropping your image onto any shape. This, in turn, masks the image and fills the shape with it. Now, regardless of how the shape’s size or dimensions change, the image inside re-adjusts proportionately.
BONUS TIP: The size of any object or image can be locked by simply clicking the lock icon in the right-hand sidebar—particularly useful when not using a mask.
Edit Photos in Photoshop from Adobe XD
Adobe XD and Photoshop synergize well. A vital feature of Adobe XD is the ability to directly open images in Photoshop for editing. On right-clicking an image and selecting ‘edit in photoshop’, the image opens in Photoshop instantly. Once all edits are done, saving the Photoshop file automatically updates the image in Adobe XD.
Efficient Export of Images from Adobe XD
- Adobe XD facilitates easy exporting of images and other asset types for usage in different applications. On selecting the image to be exported, navigate to ‘File > Export > Export Selected’ (or simply use the shortcut Command + E);
- Adobe XD offers various file types for export. Commonly, PNG and JPG at 2x are chosen. For instance, exporting an image at 1x directly exports it in size, whereas exporting at 2x doubles the image’s set dimensions, resulting in a crisp and high-resolution image ideal for retina screens.
The Magic of Image Masking in Adobe XD

Adobe XD’s image masking ability is often underutilized. This feature allows designers to overlay images with shapes, creating intriguing, layered visuals. Just like with masking for cropping, simply drag and drop your image onto a shape. The shape will take on the texture and color scheme of your image, leaving you with an extraordinary design effect.
Optimize Images for Better Performance
Optimizing your images in Adobe XD is a crucial step to enhance the performance and loading speed of your designs. Use the ‘image optimization’ feature to reduce the size of your images without losing quality. This will ensure your designs load quickly, keeping your audience engaged and improving the overall user experience.
To complement the skills learned from this guide, implementing dynamic content is key to elevating the responsiveness of your webpages.
Conclusion
Through its intuitive interface and powerful tools, Adobe XD simplifies the delicate process of image manipulation, offering a seamless user experience. From effortless importing and tracking of images to easy-to-use cropping and editing features, Adobe XD is a valuable addition to any design toolkit. Plus, with options for image masking and optimization, Adobe XD helps you create stunning, high-performance designs that truly engage your audience. Keep exploring the world of Adobe XD and unleash your creative potential!